

(Note: This post contains affiliate links. If you buy through them, I may earn a small commission at no cost to you.)
Hello all! Whether you’re a budding florist or just a DIY flower lover, knowing the basic of floristry and understanding how to use your wires can make all the difference in creating stunning floral arrangements. So, grab a cup of coffee or tea and let’s get wired up! Please note I have included affiliate links to all products on amazon below but if you have any questions or queries, I'd love to hear from you ! Just email me on trisha@flowersonfouracres.ie or DM me from Instagram.
1. The Basics: Why Use Wire in Floristry?
First off, why do we even need wire in floristry? Great question! Wire adds structure and support to your floral designs, helps secure flowers in place, and even lets you get creative with shapes and styles. It’s like the secret superhero of floral arrangements and can make or break your designs. I give you a basic breakdown below and at the end you can find the gauge dimensions so you know which wire to purchase.
2. Types of Floristry Wire:
Let’s break it down:
" Floral Wire " : The All-Rounder -also called Stub wire.
- Gauge: comes in a range of 'gauges' or sizes : 16 to 32 ( the 'gauge' if you are not an English speaker refers to the thickness of the wire )
- Use: This is your go-to wire for most floral tasks. Floral wire is one of your tool kit basics to secure flowers or add structure to a bouquet, create boutonnieres or corsages ; the best basic wire you need. Floristry wire is also called stub wire and can have different names depending on where you buy it. Lots of hobby shops or your local florist shop will have some floristry wire in stock as well. Just check your gauge or the wire thickness before you buy it.
- Fun Tip: Oddly , one thing that is slightly confusing is that the higher the gauge number, the thinner the wire. So, for example a 32-gauge wire is super thin and delicate, perfect for small, lightweight flowers while a 24 gauge wire is much thicker. In general, I do tend to use 24 gauge floristry wire a lot - for small / medium size roses or other flowers. I use this for my smaller flowers in both dried and fresh flower work. https://amzn.to/3LvwnDU For bigger stems like ranunculus where I need a thicker wire to push up through the stem, I will use a 22 gauge stub wire.
- For some really wonderful education on how to, one of my go to for wiring techniques is Joseph Massie and Passionflower Sue. If you sign up to their websites, there are lots of workshops and tutorials and lots of videos on Youtube. And yes, I have learned from watching a lot of video's on Youtube and from signing up to various floral designers. You don't need to spend a fortune starting out in floristry. Focus on a few basic skills you want to learn to start with, write down what the outcome of what you want to learn is e.g. 'I want to be able to wire a flower crown' and then work backwards. To do this you need to know what flower's you should/could use , what materials you need and what are the best techniques to create a flower crown and then do a focused timed search on this. Youtube is the best place to start. Find a style or a designer that you really love and take it from there ; and then it's all about practise. Head to your local supermarket/floristry and buy a bunch of flowers (ideally buy from your local flower farmer) but I know this isn't always possible and get the basics ; with a few pieces of floral wire, one roll of floral tape and a small bunch of flowers and some creative practise, you can create some floral magic. Here is the link to a good basic set of wires and tapes that won't break the bank https://amzn.to/4lFBzFJ.
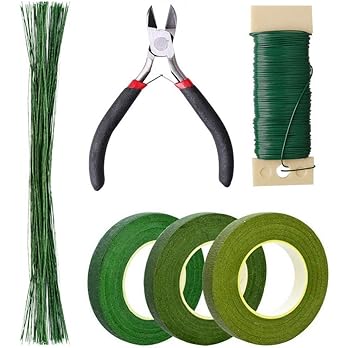
0 gauge - for inserting into very fine, fairly small leaves for delicate work like in corsages, crowns etc . Also look for wire called 'rose wire'.
26/28 gauge - for small, lightweight flowers and leaves
24 gauge - for small / medium size roses
22 gauge - For medium / large general flower use, similar to 24 gauge, but these are just a little stronger.
20 gauge - For larger flowers that need the support of a thicker wire
18 gauge - To hold very large, heavier flowers e.g. roses, lillies, chrysanthemum etc.
" Paddle Wire " : The Workhorse
- Gauge: 22 to 26
- Use: Ideal for wreaths and larger arrangements. It comes on a paddle (hence the name), making it easy to handle and great for wrapping around stems and securing larger flowers and greenery. https://amzn.to/40VrmfZ I tend to also use the paddle wire or reel wire that comes on a little wooden reel or piece of wood. Having the wire on a longer piece of wood gives me the flexibility I need when wrapping and securing foliage and flowers on wreaths.
- Fun Tip: Paddle wire is strong but flexible, so it's perfect for creating sturdy yet bendable structures.
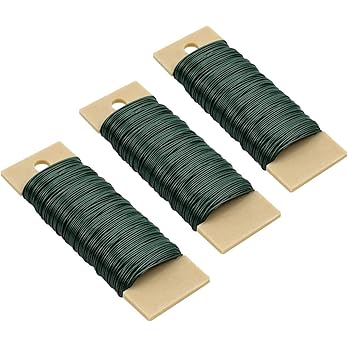
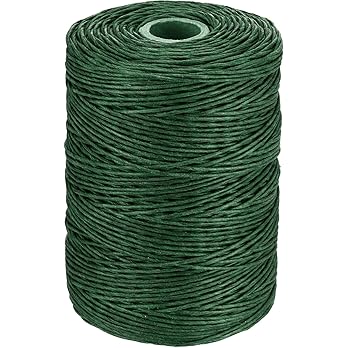
" Bind Wire" : The Natural Look
- Gauge: About 22
- Use: If you want a more rustic, natural look, bind wire is your best friend. It’s often wrapped in paper, giving it a more organic appearance. https://amzn.to/4nY3t1p I use it for tying floral boxes, ribbon work, making flower crowns and smaller designs and dried flower decorations. The green version can be used in all sorts of work but the brown paper covered wire is great for packaging, decoration and wreath work.
- Fun Tip: Use it for binding bouquets and garlands where you want the wire to blend in with the stems. Also, it is quite delicate so if you are using it in wreath work, it is better to use with delicate stems.
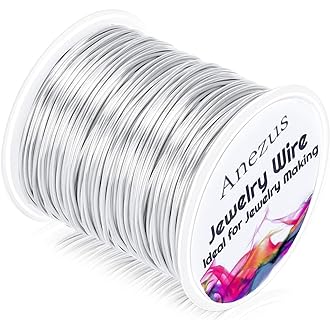
"Aluminum Wire" : The Shapeshifter
- Gauge: 12 to 18
- Use: This wire is thicker ; think spaghetti thick, but very malleable and easy to manipulate, perfect for creating shapes and structures that need to stand out, like funky, modern designs or sturdy base frames. https://amzn.to/4nY3t1p. I tend to always use this wire for my work with floral accessories and is perfect for flower crowns, corsages, rings and hair accessory work. It is also known as jewellery wire and can be purchased quite easily online.
- Fun Tip: It comes in a variety of colours, so you can add a pop of colour to your arrangements while keeping things secure. If you are looking for some wonderful tips on creative floristry with aluminium wire, check out Hitomi Gilliam's youtube videos where you will learn so much about the creative use of wire in floristry and lots of hints and tips even around the use of chenille pipe cleaners with floristry floral accessories ; I promise you will learn so much on her videos! https://www.youtube.com/watch?v=J0pllTtAS5o.
'Chicken Wire' or wire netting: The Big Helper
- Gauge: Varies and this is important. If you are doing big large arrangements with urns for example, look for a larger gauge (the spacing between each pattern in the wire). Once you start overlapping the wire if it is a very small gauge, this will make it really difficult to insert bigger branches or stems. You buy this in your local hardware or agri shop if you have one nearby but otherwise, this a link to a similar one on amazon. https://amzn.to/3zLdMkA
- Use: Not just for the hen house ! Use chicken wire as a base in large arrangements to hold stems in place. It’s especially handy for installations and larger projects. I use chicken wire or rabbit wire for all of my foam free and sustainable techniques in all of my wedding and event work along with moss, waterproof containers and pot tape to secure the chicken wire at the top of the vessel. Wrap the wire around a squished together (yes technical terms ; ) ) wet moss base 'mossage' to create a structure which provides moisture and stability for any floral design or arrangement.
- Fun Tip: It’s great for creating a strong base without using floral foam, making your designs more eco-friendly ; yes just try it. Please don't use floral foam - it is so bad for the environment and for your health and there really is no need anymore. Using chicken wire and moss, you can still create beautiful designs without floral foam! Check out Kays Floral school in Ireland for tips on building 'mossages' or moss cages. :https://www.youtube.com/watch?v=Nn-ux0uvkOg.
- For sustainable floristry mechanics /design, my go to book which I still use and is a basic how to for lots of design mechanics is this one https://agtfm.com/products/the-book . ' This book shows through basic step by step imagery and instructions how to create floral mechanics (the methods and materials used to place and hold stems of flowers and foliage within floral designs).' I think it is a really good foundation book for anyone hoping to be a sustainable florist! If you are looking to learn more floral design techniques using sustainable methods, then do check out the wonderful Shane Connolly or Phillippa Craddock for more wonderful sustainable floristry inspiration.

3. When to Use Which Wire?
Let’s keep it simple:
- Securing Delicate Flowers: Go for a higher gauge floral wire (28-32).
- General Use: Standard floral wire (22-26) will be your best bet.
- Large Arrangements & Wreaths: Paddle wire or chicken wire will provide the needed support for bigger and woodier blooms and stems.You can also use the wires in conjunction with water tubes (lots of different sizes and also with grave spikes or 'grave vase' ) in larger arrangements. The secret is to secure the chicken wire and water vessel well using 'pot tape' and select the right size container for the job.
- Creative Shapes & Designs: Aluminium wire will let your imagination run wild. Flower crowns, corsages, floral accessories, hair flowers, etc.
- Natural, Rustic Arrangements: Bind wire or paper covered wire will give you that seamless, earthy look.
4. Pro Tips:
- Double Up: For extra strength or if you need a thicker wire gauge, twist two wires together e.g. to make a flower crown. Sometimes you have to test out wire strengths to see what you like and what works best with the flowers you have to hand. Definitely do not leave wiring to the last minute for an event or wedding when starting out. Havoc and stress may ensue!
- Wrap It Up: Always wrap wire neatly around stems to avoid damaging them and cover them in floral tape for a finished look and to ensure there are no sharp edges.
- Colour Code: Use different coloured wires to keep track of various elements in your arrangement, if you like that sort of thing!
- Wire cutters : Don't use your good snips/pruners or scissors to cut wire as this will damage the blade. Just get a good wire cutters or use a household pliers if you have one. It doesn't need to be fancy or expensive. Just mind your good floristry snips - it is so important to keep the blades sharp.
- Working with ribbons : The same for scissors, if you are using ribbons in your designs, always keep a separate and dedicated scissors (better if you can use a fabric scissors) for ribbons as otherwise you will fray the edges with blunt edges, and ribbons can be expensive so take it from me - label your ribbon scissors.
Gauge Dimensions
18 1.29mm
20 0.96mm
22 0.83mm
24 0.68mm
26 0.54mm
28 0.48mm
30 0.46mm
And don't forget your florist or stem tape. If you are using wires, then you should also be using tape to safely cover wire ends ; floral tape is a paper based tape with its own glue, which, when stretched will become sticky and adhere to itself. It is used to tape flower/leaf stems for a more natural stem realistic finish, and taping stems together when making a spray or corsage for example. You also use it to cover off the of wires, for buttonholes etc. It is available in different sizes and colours.
'Pot' tape is a different tape altogether. Pot tape is a much stronger, woven tape and is waterproof and durable. It can also be called florist tape so just make sure which you are purchasing before you purchase. It generally comes in either green or just transparent/clear version and is perfect for securing chicken wire into vessels, for arranging on tops of vases or containers and also making centrepieces for example. It's essential for bigger arrangements and holding mossages and bulk together for table and vase arrangements.
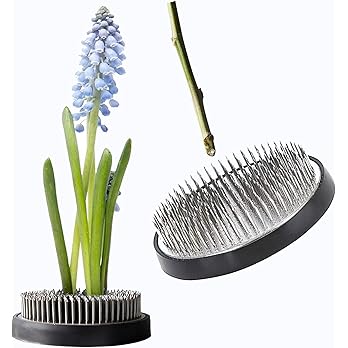
And finally, do also check out floral frogs. I just love flower frogs. They are generally speaking a little sturdy piece of metal with upright pins attached and act as a base for flower stems in any vase -also called Kenzan or pin frog. Vintage versions can be found made of glass and silver in antique or charity shops. With some floral tack you can secure them to the base of any vase or container and build your design even with bigger stem flowers but are wonderful for creating light and airy arrangements and showing off the beauty of floatier flowers like cosmos, ranunculus and smaller delicate flowers. The stems simply sit into the metal pins and hold them in place. These cost a little more but can be used again and again so you can build your collection of them. I also have a massive love for vintage bits so I will actively search out flower frogs in charity jobs -they tend to be glass or metal as well. I will pop in some pictures below later.
5. Get Creative!
Don’t be afraid to experiment with different wires and techniques. The more you play around, the more you’ll discover what works best for you. And remember, the right wire can transform your floral designs from “meh” to “wow!” I hope this articles helps to get you started.
So, next time you’re putting together a bouquet or crafting a centrepiece, you’ll know exactly which wire to reach for. Happy arranging, flower friends!
Notes to remember :
- The terms "florist wire" and "stub wire" are often used interchangeably, but generally, "stub wire" refers to shorter, straight lengths of wire used for structural support and extending stems, but "florist wire- paddle or reel wire" can come on spools for wrapping and binding.
- Wire gauge numbers work inversely to their thickness: a lower gauge number indicates a thicker wire.
- The "Sizes' provided above are approximate diameters and can vary slightly between manufacturers.
- The specific needs of a design and the condition of the flowers will influence the best wire choice. If you are costing floral designs, definitely DO remember to allocate and cost out your time and hours for wiring - wiring well requires both patience and practise to get both fast and efficient without damaging stems and is essential for certain flowers like ranunculus (which might need extra support especially in wedding work ! )
- Different colors of wire are available and are often chosen to blend in with the stems or foliage for a more professional look.
Remember to consider the weight and fragility of the flowers and the structural requirements of your design when selecting the appropriate wire. Experimenting with them is the best way to start out!